

Email Templates
Customize the emails that Deckyard sends to users.
Overview
Section titled “Overview”Deckyard uses templates for all outgoing emails. You can customize these to match your brand and communication style.
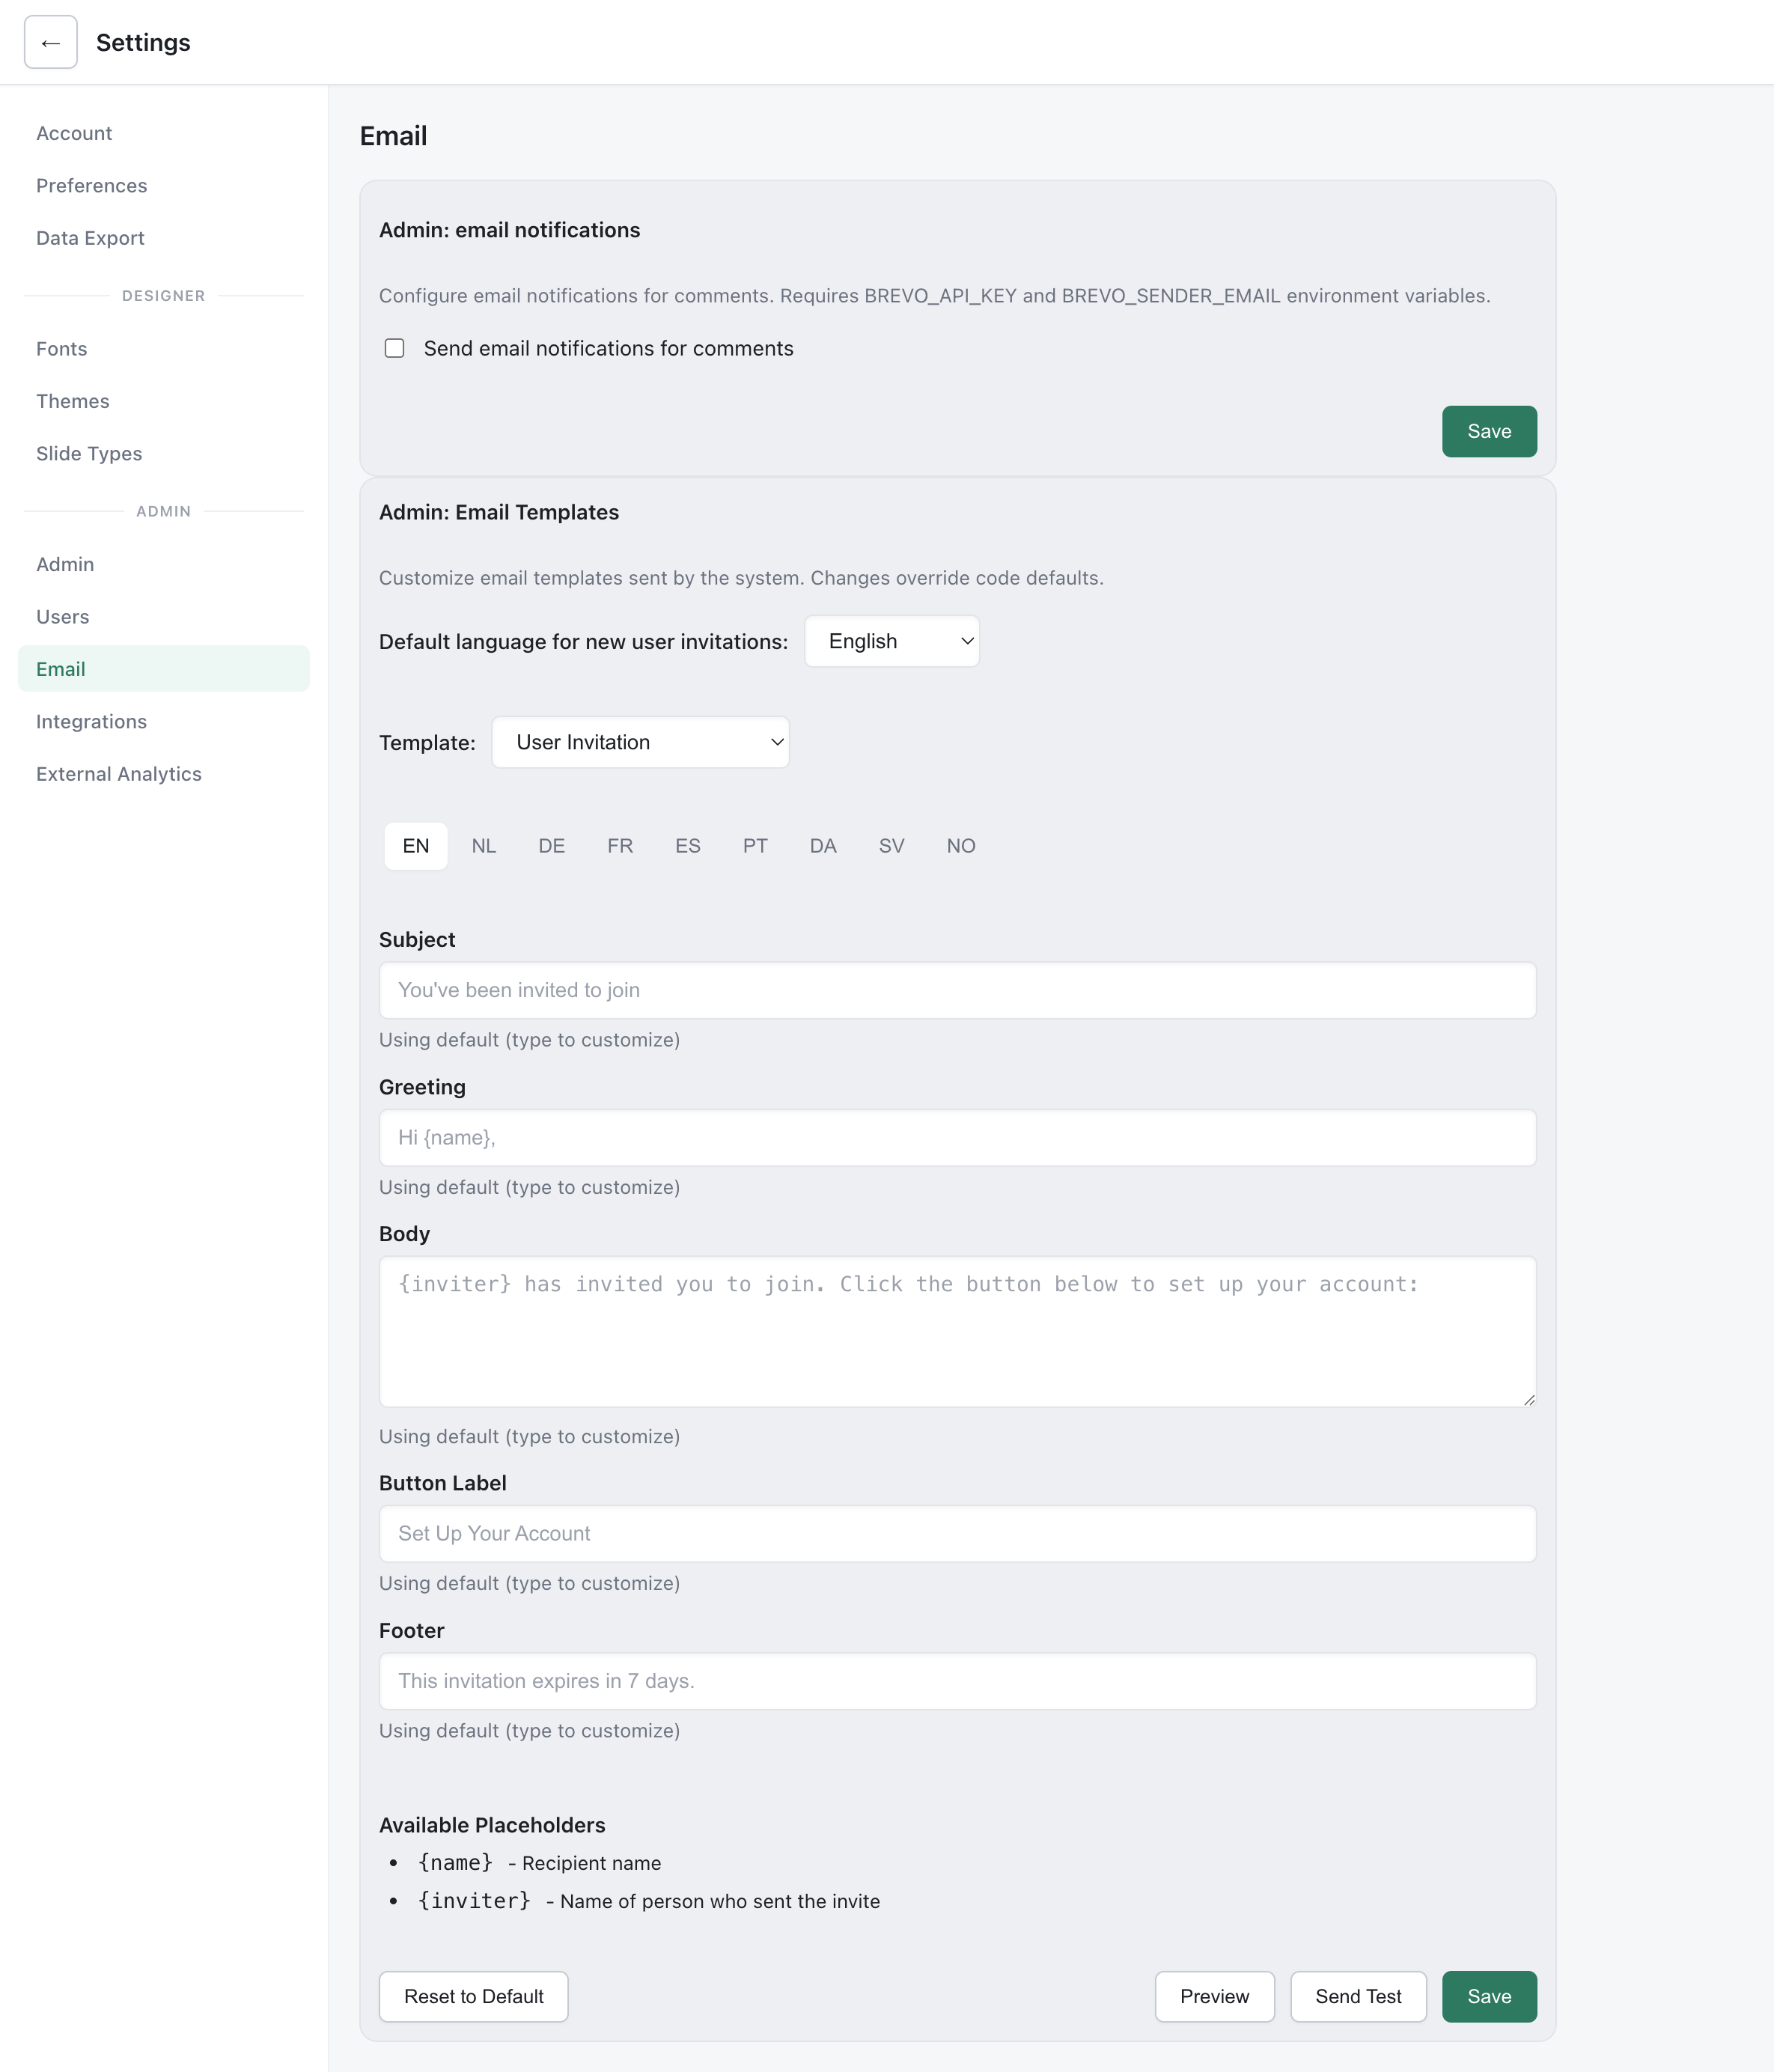
Available Templates
Section titled “Available Templates”These are the templates an admin can customize:
| Template | Sent when |
|---|---|
| User Invitation | An admin invites a new user |
| Activation Reminder | A user has not yet activated their account |
| Collaborator Invitation | Someone shares a presentation with a collaborator |
| Guest Invitation | Someone invites a guest to view a presentation |
| Password Reset | A user asks to reset their password |
| Magic Link | A user signs in without a password |
| Comment Notification | Someone comments on a presentation |
| Guest Email Verification | A guest verifies their email address before commenting |
Other emails, such as the weekly digest and the export-ready notice, use fixed templates.
Customizing Templates
Section titled “Customizing Templates”Template Structure
Section titled “Template Structure”Each template has five customizable fields:
- Subject - Email subject line
- Greeting - Opening line
- Body - Main text
- Button Label - Text on the action button
- Footer - Closing text
Overrides and Defaults
Section titled “Overrides and Defaults”Customizations are stored as overrides per template and language. A field you leave untouched uses the built-in default. Deckyard resolves each field in this order:
- Your override for the recipient’s language
- The built-in default for that language
- The built-in English default
Template Placeholders
Section titled “Template Placeholders”Placeholders are written in single braces, such as {name}, and are replaced when the email is sent. Values are HTML-escaped.
| Template | Placeholders |
|---|---|
| User Invitation | {name}, {inviter} |
| Activation Reminder | {name}, {inviter} |
| Collaborator Invitation | {name}, {inviter}, {presTitle}, {permission}, {accessLevel} |
| Guest Invitation | {name}, {inviter}, {presTitle} |
| Password Reset | {name} |
| Magic Link | none |
| Comment Notification | {commenterName}, {presTitle}, {commentBody} |
| Guest Email Verification | {name}, {presTitle} |
Localization
Section titled “Localization”Templates support multiple languages:
Supported Locales
Section titled “Supported Locales”en/en-GB- Englishnl- Dutchde- Germanfr- Frenches- Spanish- And more…
Locale Selection
Section titled “Locale Selection”The email locale is determined by:
- Recipient’s language preference (if known)
- Default email locale setting
- Fallback to English
Setting Default Locale
Section titled “Setting Default Locale”Configure the default email locale via app settings or environment:
EMAIL_DEFAULT_LOCALE=enEditing Templates via Admin Panel
Section titled “Editing Templates via Admin Panel”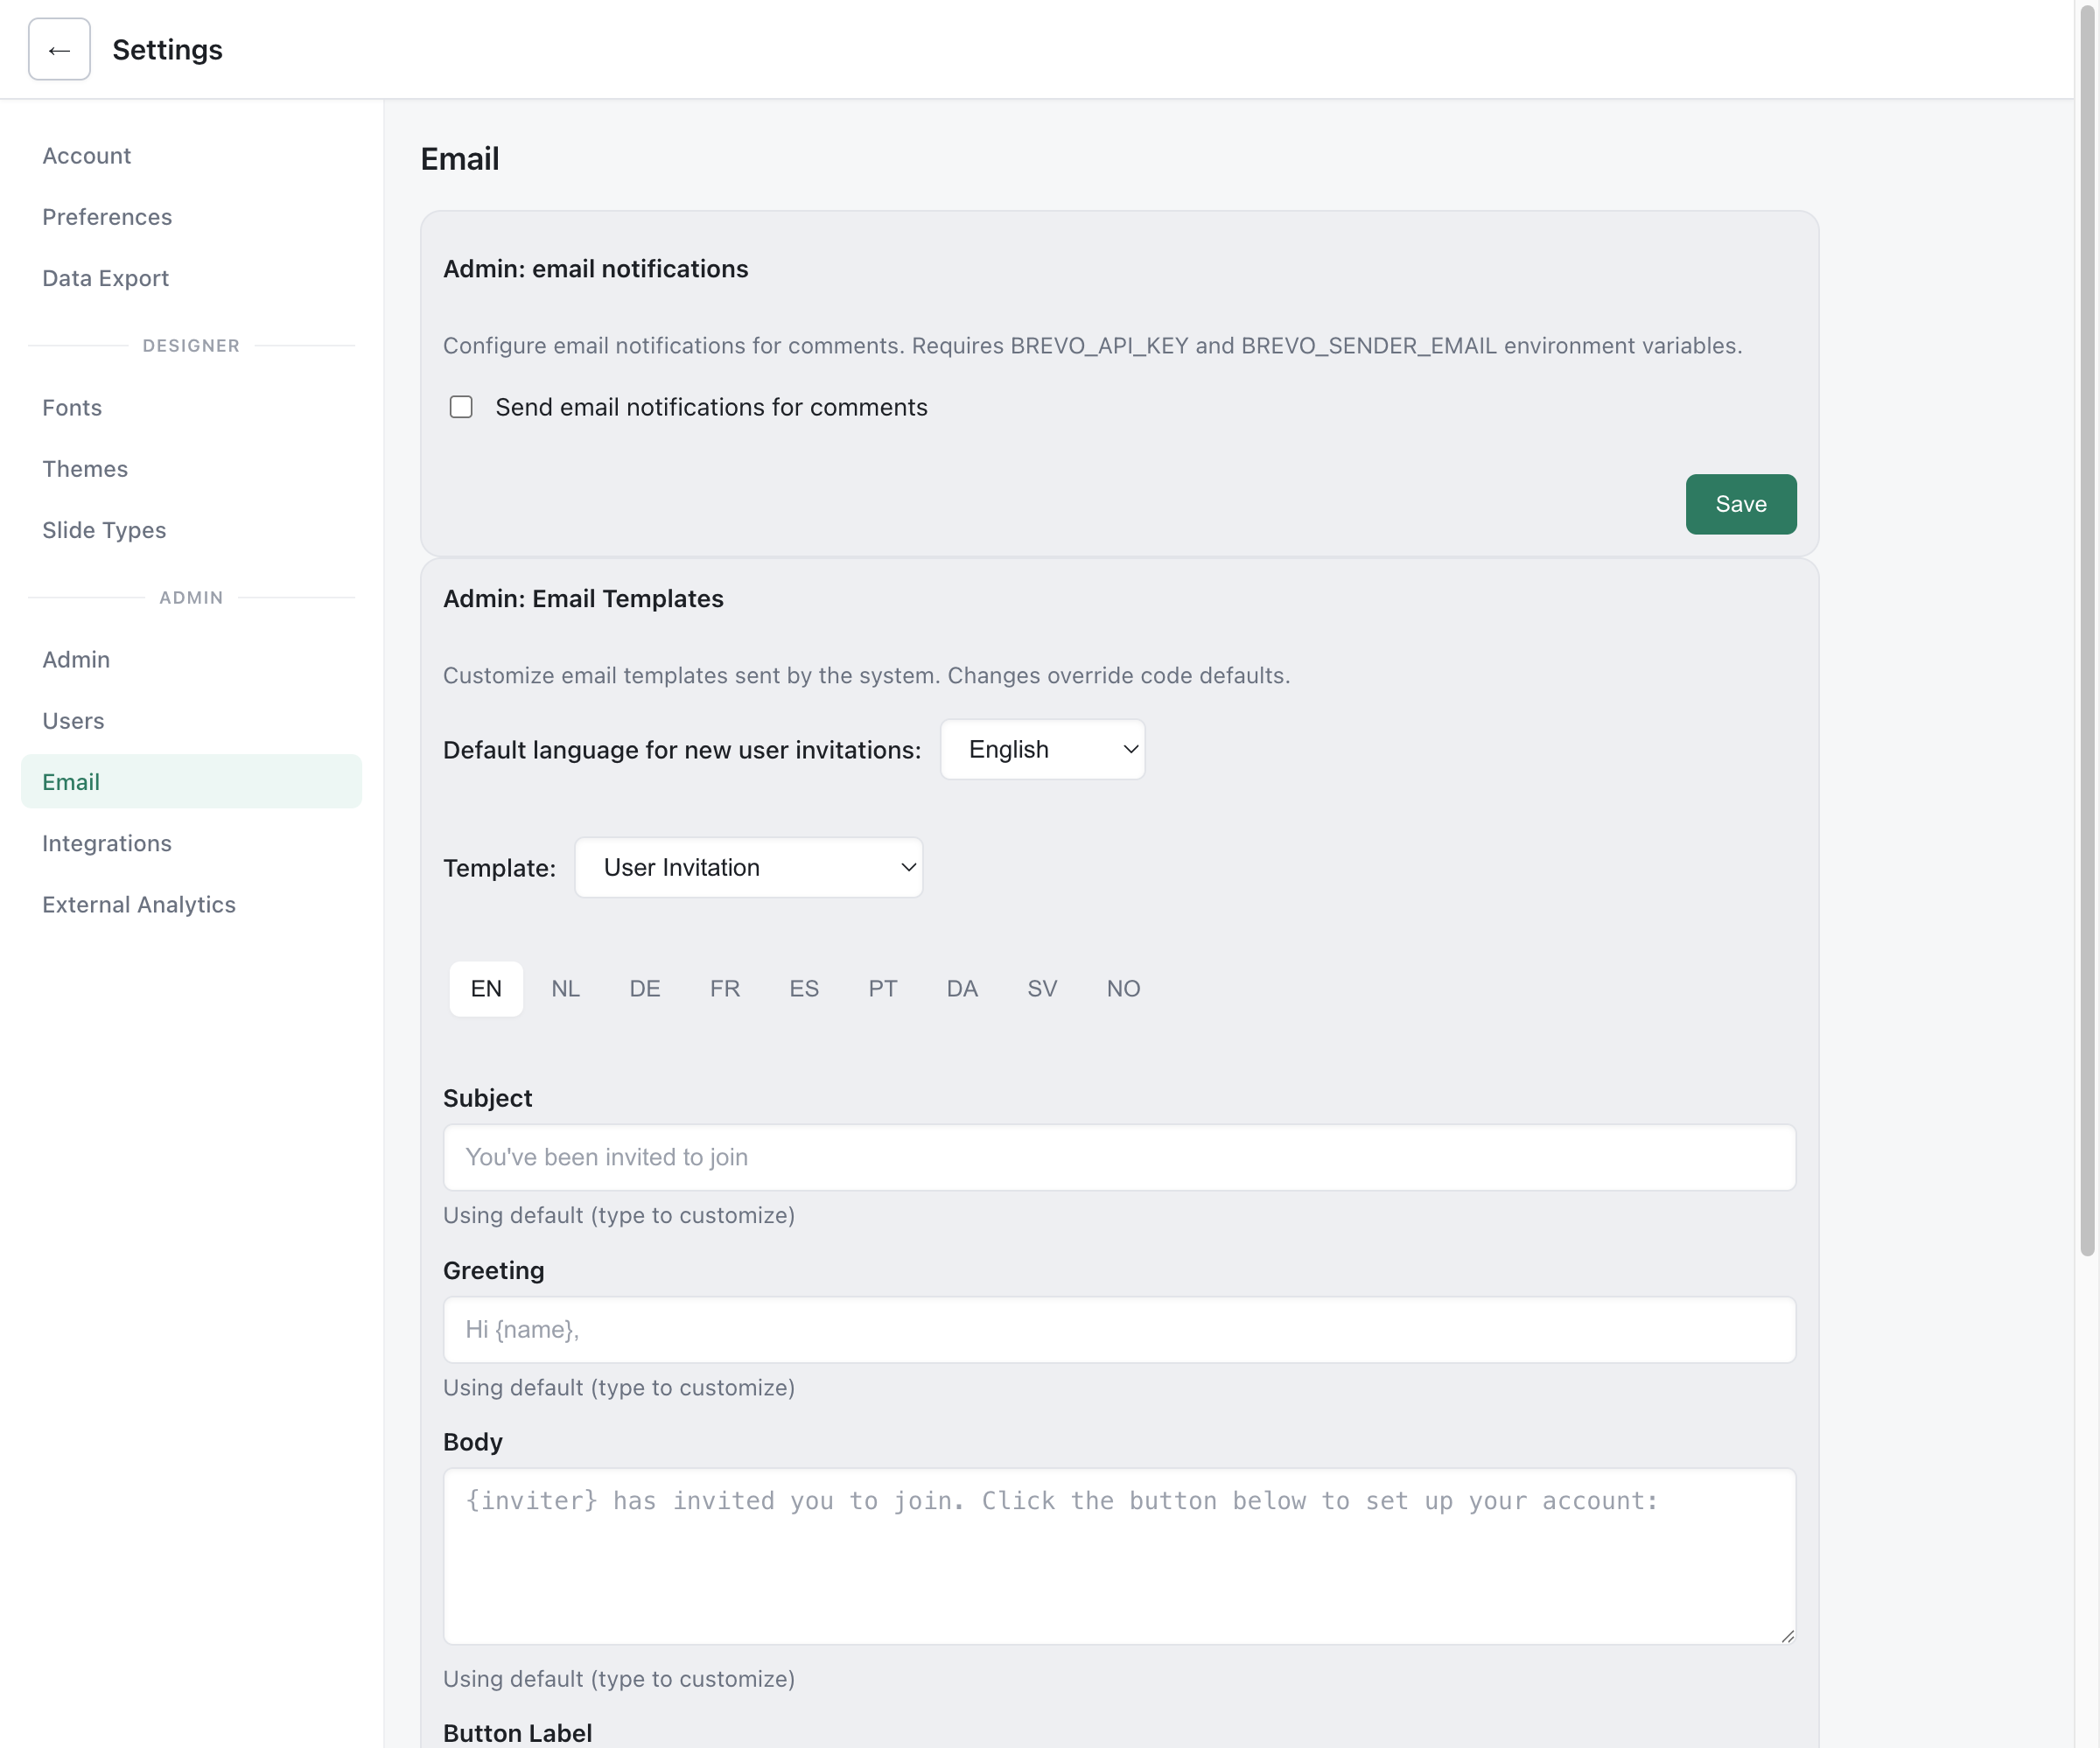
- Go to Admin > Email Templates
- Select the template to edit
- Choose the language
- Edit the subject and body
- Preview the changes
- Save
Template Preview
Section titled “Template Preview”The admin panel includes a preview feature:
- See how the email will look
- Test with sample data
- Send a test email to yourself
HTML Email Best Practices
Section titled “HTML Email Best Practices”When customizing templates:
Use Inline Styles
Section titled “Use Inline Styles”Email clients have limited CSS support. Use inline styles:
<p style="color: #333; font-size: 16px;">Hello {name}</p>Keep It Simple
Section titled “Keep It Simple”- Use table-based layouts for consistency
- Avoid complex CSS (flexbox, grid)
- Test in multiple email clients
Responsive Design
Section titled “Responsive Design”Use a single-column layout that works on mobile:
<table width="100%" style="max-width: 600px;"> <tr> <td style="padding: 20px;"> <!-- Content --> </td> </tr></table>Branding
Section titled “Branding”Include your brand elements:
- Logo (as hosted image)
- Brand colors
- Consistent typography